
A Short Tutorial on XMLHttpRequest()
By Bob Smith
Introduction
This tutorial will show you how to build a web page that responds to asynchronous events. In five simple exercises, we'll show you the core of an Asychronous JavaScript And XML (AJAX) application. You'll have to learn a little JavaScript, but there's no requirement to learn anything about XML. Our goal is to show you how to build a responsive web application with a minimum investment of time.
What you should already know: You should be familiar with basic web page creation and have a general idea of the client/server nature of web page requests. You should also understand how CGI programs work and have some experience with CGI programming; we use a few lines of PHP in our exercises, but you can replace this with C or Perl if you wish.
Requirements for the examples: To do the exercises in this tutorial, you will need a browser with JavaScript enabled. JavaScript is on by default in most browsers, so this shouldn't require any action on your part unless you prevously disabled it. You will also need to have a web server that supports PHP and CGI, and the ability to upload web pages to it. You should be ready to go if you already have Apache and PHP installed on your PC; in fact, our exercises assume that you're using your PC for the web server.
Application Overview
To illustrate the need for AJAX, let's consider a real-world example: we've built a telephone answering machine and we want the caller ID information to be presented on a web page, which we can view while we are at home or at work. The data flow in our application looks something like this:
(answering_machine -> syslog -> fifo -> Apache -> web_page)Our answering machine will log caller ID information via syslog using LOG_LOCAL3, a facility not used by any other applications on our system, and a syslog rule in '/etc/syslog.conf' will direct messages with this facility to a FIFO located in the Apache document directory. In this tutorial, we will deal with getting the strings from that FIFO to display on a web page. Writing to a FIFO is the asynchronous part of our sample application.
Getting Started
In the first exercise, we are going to test the development environment by running a simple PHP application. Save the following program as getfifo.php in the document directory of your web server:
<?php
  $fp = fopen("ajaxfifo", "r");
  if ($fp) {
    $ajaxstring = fgets($fp, 128);
    fclose($fp);
  }

  header("Content-Type: text/html");
  print($ajaxstring);
?>
Now, create a fifo in the same directory:
mkfifo ajaxfifoTry to view getfifo.php using your web browser; it should hang, waiting for the read of 'ajaxfifo' to complete. Write some data to the FIFO before the browser times out:
echo "Hello, World" > ajaxfifoThe text that you entered should appear in your browser window. Continue on to the next exercise if the data was displayed properly. If the data did not appear, go back and verify that the web server and PHP are installed and working properly.
DOM in Two Lines of Code
JavaScript is an object-oriented language and treats a displayed web page as an object. The Document Object Model, or DOM, describes the objects, properties, and verbs (or methods) available within JavaScript. By using the DOM, you can name different parts of a web page and can then perform different actions on those parts.
The following exercise verifies that JavaScript is enabled in your browser by creating a named region on a web page, and putting some text into that named region. Copy the following program to hello.html in the document directory of your web server:
<html>
<head>
<title>Exercise 2: Use DOM to Test JavaScript</title>

<script language=javascript type="text/javascript">
<!-- Hide script from non-JavaScript browsers

  // SayHello() prints a message in the document's "hello" area
  function SayHello() {
    document.getElementById("hello_area").innerHTML="Hello, World";
    return;
  }

-->
</script>
</head>

<body onload="SayHello()">
<h3><center>Exercise 2:  Use DOM to Test JavaScript</center></h3>
</p>
<div id="hello_area">This text is replaced.</div>
</body>
</html>
The above code defines a section of the web page as "hello_area"
and uses the subroutine SayHello() to put text in that
section. Load hello.html and verify that your browser's
JavaScript displays "Hello, World" on the web page.
Callbacks in JavaScript
A callback is a subroutine that is called when a particular event occurs. JavaScript has a fairly complete set of events to which you can attach a callback. The following program starts a timer using a callback that is invoked when the page is loaded, and a callback associated with the timer displays a counter and restarts itself. Copy this program to callback.html in your server's document directory, and verify that the count is updated in your browser window every two seconds.
<html>
<head>
<title>Exercise 3: A JavaScript Callback Demo</title>

<script language=javascript type="text/javascript">
<!-- Hide script from non-JavaScript browsers
  var count;
  count = 0;

  // Put the current count on the page
  function DisplayCount() {
    // Put current time in the "count" area of the web page
    document.getElementById("count_area").innerHTML=
      "The count is: " + count++;

    // Schedule next call to DisplayCount
    setTimeout("DisplayCount()", 2000);
    return;
  }
-->
</script>
</head>

<body onload="DisplayCount()">
<h3><center>Exercise 3: A JavaScript Callback Demo</center></h3>
<div id="count_area">This text is replaced.</div>
</body>
</html>
How to use XMLHttpRequest()
XMLHttpRequest is a JavaScript subroutine that lets you make an HTTP request and attach a callback to the response. Since the response has a callback, the browser is free to continue responding to user input. In a way, XMLHttpRequest is to JavaScript what select() is to C - a way to wait for an event. XMLHttpRequest() is what puts the 'A' in AJAX.
The following exercise adds only XMLHttpRequest() to the previous examples. We request the data from getfifo.php using XMLHttpRequest(), and tie a callback to the arrival of the response. The response callback displays the data using a named division per the DOM. Copy the following code into async.html:
<html>
<head>
<title>Exercise 4: An XMLHttpRequest() Demo</title>

<script language=javascript type="text/javascript">
<!-- Hide script from non-JavaScript browsers

  var req_fifo;

  // GetAsyncData sends a request to read the fifo.
  function GetAsyncData() {
    url = "getfifo.php";

    // branch for native XMLHttpRequest object
    if (window.XMLHttpRequest) {
      req_fifo = new XMLHttpRequest();
      req_fifo.abort();
      req_fifo.onreadystatechange = GotAsyncData;
      req_fifo.open("POST", url, true);
      req_fifo.send(null);
    // branch for IE/Windows ActiveX version
    } else if (window.ActiveXObject) {
      req_fifo = new ActiveXObject("Microsoft.XMLHTTP");
      if (req_fifo) {
        req_fifo.abort();
        req_fifo.onreadystatechange = GotAsyncData;
        req_fifo.open("POST", url, true);
        req_fifo.send();
      }
    }
  }

  // GotAsyncData is the read callback for the above XMLHttpRequest() call.
  // This routine is not executed until data arrives from the request.
  // We update the "fifo_data" area on the page when data does arrive.
  function GotAsyncData() {
    // only if req_fifo shows "loaded"
    if (req_fifo.readyState != 4 || req_fifo.status != 200) {
      return;
    }
    document.getElementById("fifo_data").innerHTML=
      req_fifo.responseText;

    // Schedule next call to wait for fifo data
    setTimeout("GetAsyncData()", 100);
    return;
  }

-->
</script>

</head>
<body onload="GetAsyncData()">
<h3>Exercise 4: An XMLHttpRequest() Demo</h3><p>
<div id="fifo_data"> </div>

</body>
</html>
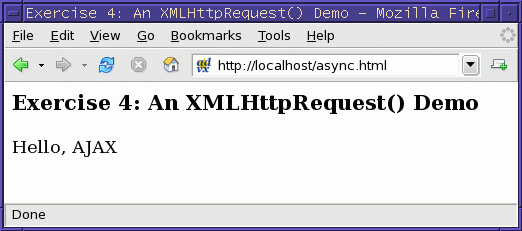
Load async.html and, if all has gone well, everything sent
to ajaxfifo will appear in the browser window. For example:
echo "Hello, AJAX" > ajaxfifo
An Appliance Web UI
If you were building an appliance (such as our answering machine), you'd want your web UI to respond to events occuring in the appliance; the exercises above show how to do this. But you might also want your appliance UI to have some controls available to the user. The final exercise below adds code to the previous exercise to show you how to tie buttons in a web form to JavaScript subroutines. This exercise demonstrates that a web UI can wait for asynchronous events and still be interactive.
Copy async.html to a file called webui.html and add the following subroutine to the JavaScript code:
// setColor updates the "color_area" with the color specified
  function setColor(new_color) {
    color_text = "<table border=2 bgcolor=";
    if ("Blue" == new_color) {
      color_text += "\"Blue\">"
    }
    else if ("Red" == new_color) {
      color_text += "\"Red\">"
    }
    else {       // shouldn't get here
      color_text += "\"Green\">"
    }
    color_text += "<tr><td>A little color</td></tr></table>";
    document.getElementById("color_area").innerHTML=color_text;
  }
Add a form to the HTML part of webui.html:
<body onload="GetAsyncData()">
<h3>Exercise 5: A Trivial Web UI</h3><p>
<div id="fifo_data"> </div>
<p>
<div id="color_area">No color yet.</div><p>
<form>
<input type=button value="Blue" onClick="setColor('Blue')">
<input type=button value="Red" onClick="setColor('Red')">
</form>
</body>
Summary and Notes
In this short tutorial, we've explored the fundamentals for building responsive, interactive web interfaces using JavaScript and XMLHttpRequest(). In order to focus on the core concepts, we've ignored many important details, such as error handling and return codes. Hopefully, you can add the techniques shown in this article to your web toolbox.
FIFO versus /dev/fanout: Open two browser windows displaying async.html and write some data into the FIFO; notice that the data that you write will appear in only one window. This is because the FIFO passes the data to only one of the readers. In a real application, we would want to use a fanout device so that the data is written to all readers. Fanout is described in a previous Linux Gazette article as well as on the author's home page.
XML: If you are getting only a single piece of data from your web server, you can use the code in this article. As soon as you ask for more than one piece of data, you should switch to XML. It does not need to be difficult.
As an example, let's say that you've modified getfifo.php to use the caller ID to look up the time and duration of the last time you spoke with the caller, and you want to return this information along with the caller ID string. The PHP code to build an XML response for the three pieces of data might look like this:
<?php
  header("Content-Type: text/xml");
  print("<?xml version=\"1.0\" ?>\n");
  print("<caller_info>\n");
  printf("<caller_id>%s</caller_id>\n",       "Mary");
  printf("<lastcalltime>%s</lastcalltime>\n", "10:24 am");
  printf("<lastcalldur>%s</lastcalldur>\n",   "12:05");
  print("</caller_info>\n");
?>
Instead of using req_fifo.responseText to get the whole
body of the reply, you would use the following to extract each
of the three fields you want:
  callid = req_fifo.responseXML.getElementsByTagName("caller_id");
  calltm = req_fifo.responseXML.getElementsByTagName("lastcalltime");
  calldur = req_fifo.responseXML.getElementsByTagName("lastcalldur");
  callid[0].childNodes[0].nodeValue;

  document.getElementById("caller_data").innerHTML=
    callid[0].childNodes[0].nodeValue;
  document.getElementById("lastcalltime").innerHTML=
    calltm[0].childNodes[0].nodeValue;
  document.getElementById("lastcalldur").innerHTML=
    calldur[0].childNodes[0].nodeValue;
There are simpler and better ways to do this, but the above code
should give you an idea of what to expect.
Further reading: The Apple developer's web site has a
good article on XMLHttpRequest(). You can find it here:
http://developer.apple.com/internet/webcontent/xmlhttpreq.html
You may find the tutorials at the JavaScript Kit web site to be a big
help if you'd like to expand on the knowledge you've gained from this
article. You can find their tutorials here:
http://www.javascriptkit.com/javatutors/
The IBM DeveloperWorks web site has some great articles on AJAX
and XML. We found this one particularly useful:
http://www.ibm.com/developerworks/web/library/wa-ajaxintro1.html
Finally, you might be interested in the low cost answering machine
that's at the heart of this author's appliance:
http://www.linuxtoys.org/answer/answering_machine.html
Talkback: Discuss this article with The Answer Gang
![[BIO]](../gx/authors/smith.jpg)
Bob is an electronics hobbyist and Linux programmer. He is one of the authors of "Linux Appliance Design" to be published by No Starch Press.
